Hi,
Even though no one ask me for this, I hope i can help someone who want to achieve the same ink n paint + AO render as mine.
Below is the setting I use for the AO (click to enlarge) :
Below is the setting I use for 'Ink n Paint' material :
Tips for mental ray users : If you want to assign all object to the same material, use 'material override' in Mental ray render setup -> Processing -> material override and drag to the button.
Hope that helps! thanks for your visit
Showing posts with label Render. Show all posts
Sunday, September 26, 2010
Thursday, November 05, 2009
Tutorial - How to create realistic Lighting in 3Ds Max
Someone has asked me how I do the lighting setup for my 3D car render, so here it is.
(Click the picture to see full size)
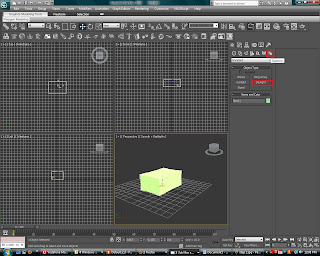
1) On the create panel, choose system. Then click Daylight to create a daylight system.
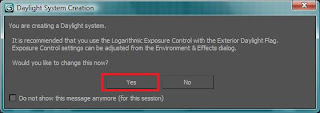
2) A dialog box will appear. Choose Yes
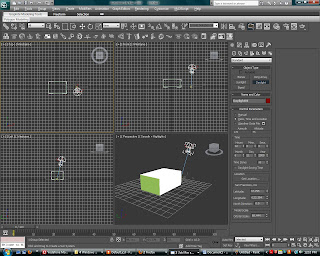
3) On Top viewport, click at anyplace to create the daylight system. I recommend you put the daylight system far from the object you created so that the icon doesnt mess up wih your object. The method of creation is : First you create a compass. Then another click you will be setting the height of the sun system. You dont have to worry about the exact height because Max will take care of this later when we set the parameter.
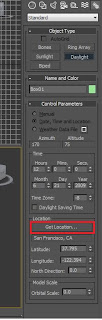
4) On the control parameter rollout on the right of your screen, click 'Get Location'
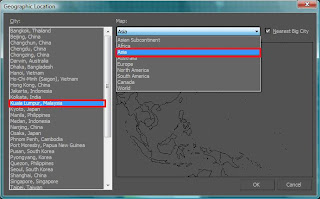
5) Choose geographic location for your scene setup. I choose Asia - Kuala Lumpur, Malaysia. Click OK.
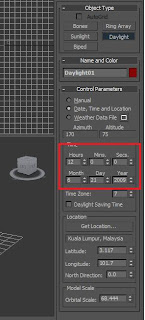
6) Then on the same rollout, set the time you desired.
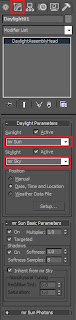
7)Go to modify panel and on the Daylight Parameter rollout change the Sunlight system to 'mr Sun' and Skylight system to 'mr Sky'.
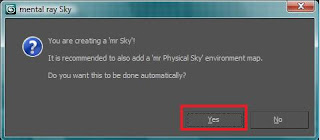
8) A dialog box will pop-up when you choose mr Sky. Choose Yes.
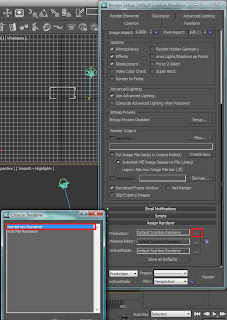
9) You need to set the renderer to Mental Ray for this thing to work. On Render setup, on the 'Assign Renderer' rollout, for production choose mental ray renderer.
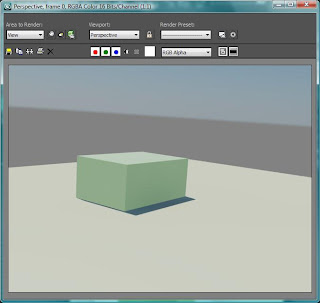
Both of the render below is the result of the lighting setup above.
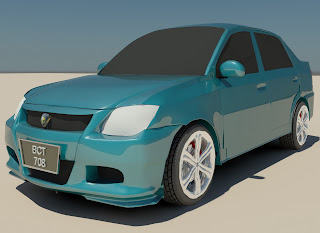
Thank you. Comments in English and Malay are welcome
(Click the picture to see full size)
1) On the create panel, choose system. Then click Daylight to create a daylight system.

2) A dialog box will appear. Choose Yes

3) On Top viewport, click at anyplace to create the daylight system. I recommend you put the daylight system far from the object you created so that the icon doesnt mess up wih your object. The method of creation is : First you create a compass. Then another click you will be setting the height of the sun system. You dont have to worry about the exact height because Max will take care of this later when we set the parameter.

4) On the control parameter rollout on the right of your screen, click 'Get Location'

5) Choose geographic location for your scene setup. I choose Asia - Kuala Lumpur, Malaysia. Click OK.

6) Then on the same rollout, set the time you desired.
7)Go to modify panel and on the Daylight Parameter rollout change the Sunlight system to 'mr Sun' and Skylight system to 'mr Sky'.
8) A dialog box will pop-up when you choose mr Sky. Choose Yes.

9) You need to set the renderer to Mental Ray for this thing to work. On Render setup, on the 'Assign Renderer' rollout, for production choose mental ray renderer.

Both of the render below is the result of the lighting setup above.


Thank you. Comments in English and Malay are welcome
Subscribe to:
Posts (Atom)
