Okay, as promised, here is the UVW map tutorial. This is a very basic technique to texturing, and its a prelude to my next tutorial, Unwrap UVW mapping.
UVW is a coordinate system for textures. it is almost similar to XYZ system, with U represent X axis of the 2D surface (your 3D model surface), V represent Y axis. You might ask why 2D plane have a Z axis (depth)? This is for the system to recognize normal or flipped texture. It is used mostly on procedural map and it does not effect your normal bitmap texture.
So why you need to apply the UVW map modifier. If you are applying your texture to your 3D model by simply dragging it to the model and hoping it will come right, you might face problem later when one time you have complex model to texture. Model that is build using line and extrude modifier will also face this problem most of the time.
If you use the coordinate rollout inside the diffuse bitmap material box, he Tiling and Offset thingy to coordinate your texture on the model, you also might face problem later if you want to use the same material on other polygons.
So, here the UVW map come to the rescue.
UVW map allow you to set the coordinate/position of your model texture individually. Let say you have a 3D house model. You want to use brick texture. At first on the front of the house you may want to have a different look, by tilting the brick at 70 degree, with the size of brick that is suitable for it. However, at the other parts such as the pillar, you want the brick to have bigger brick size and aligned horizontally. This is possible by using UVW map modifier separately for each object (wall and pillar).
Below is the basic method on how to use UVW map on a simple box.
First, create a simple box.
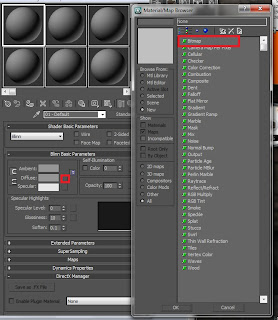
Open material browser, click the diffuse map, the pop-up list, choose bitmap.
Choose any texture that you like, in this tutorial I use a brick texture.
Click the show standard map in viewport. Drag the brick slot onto the material.
Select the box, and on the modify panel, modifier, choose UVW map
There are several options on the parameter rollout after you apply the UVW mapping to the box.
For this lessons, we choose Box mapping, and on the Alignment sub-section below, choose Fit. It will automaticly adjust the map gizmo to fit the selected object. You can try to experiment the Alignment XYZ radio button and see the results.
To adjust, use the U/V tile shown in picture below. adjust to your liking.
click the UVW Mapping modifier on the modifier stack. The word Gizmo will be shown. click the gizmo word.
You can adjust the gizmo box by using move and rotate tool.
Thats all for the tutorial. On the next tutorial I will share with you on how to use UVW unwrap.


No comments:
Post a Comment