I've been asked about how to do artificial reflection on objects by Fridz-max last month, but only now I've able to spend some time to do the tutorial. Sorry for waiting.
Artificial reflection on 3D object involves the use of HDRI, High Dynamic Range Images, that use approximately seven high resolution images of the same scene at different exposure. Well luckily we dont have to do that as there is plenty of HDRI images readily available on the net, and some of them are absolutely free. Try google 'HDR free download' .
Instead of normal JPEG or BMP, the extension will be .HDR. Here are one of my HDR resource.
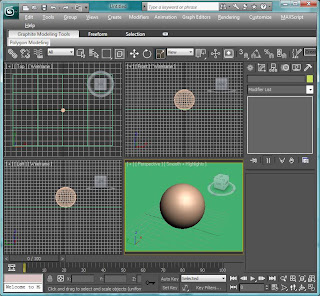
Click here>> Smash-method-HDR 3<<. In this tutorial I prepared a simple scene which has a 'sphere' as the subject and a big 'plane' surface as the ground. Then I add daylight system like one on the previous tutorial.
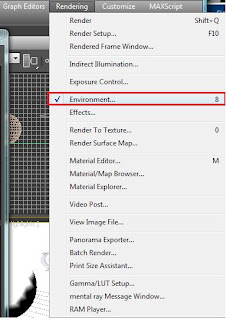
Next, go to Rendering menu, and choose Environment.
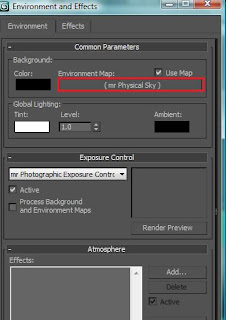
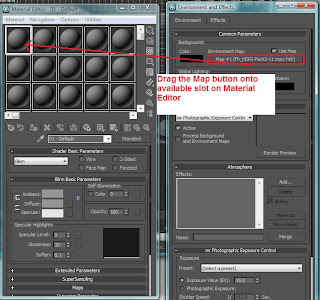
On the Environment and Effects window, on Background rollout, click the button shown below.
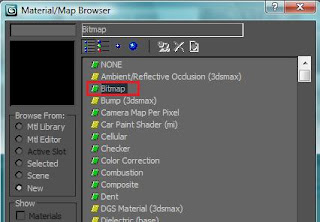
Material/Map Browser window will pop-up. From the list below choose Bitmap.
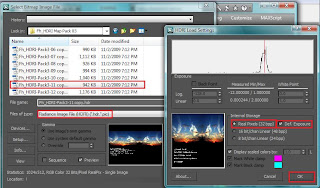
Next, choose on the Files type tab, choose 'Radiance Image File (HDRI)'. Navigate thru the folder which you store the HDR files that you have downloaded. Make sure you extracted the files if its in ZIP or RAR files using Winrar or Winzip.
Once you have chosen the desired image, click Open. Another window will pop-up. Click the settings according to the picture below.
Next, on 3Ds Max buttons, click the Material button shown below.
 Material Editor Window will pop-up. Move the window beside the Environment and Effects so that both of the window are cleary seen. Then, drag the 'Map' button to any available Material slots.
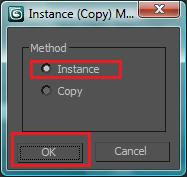
You will be asked wheter to Instanced the material or to Copy. Choose Instanced.
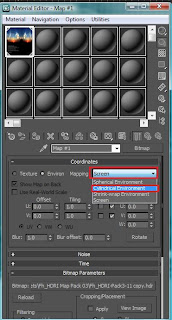
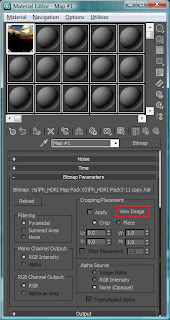
Then, on the material editor window, under Coordinates rollout, change the Mapping from Screen to Cylinderical.
 Then, scroll down until you found the Bitmap Parameter rollout. Click the View Image button.
A window of the HDR picture will show up. If you download the HDR pack from the link that I give, you will notice a credits of the author on the bottom of the picture. This will show up on the reflection later, so we need to crop out the text, leaving only the desired picture. On the bottom center of the picture you will notice a small box that can be dragged. Click-hold the box, and drag it upward until just where the picture ends. See picture below.
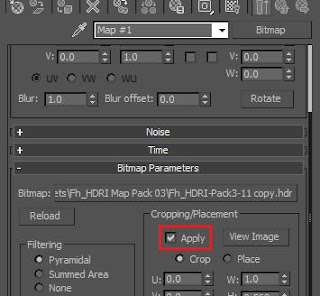
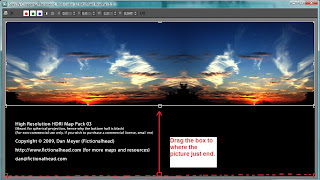 Once done, close the picture window. Tick the 'Apply' checkbox shown below
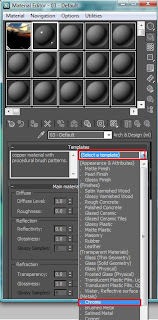
We have finish setting up the environment. In order to test it we need to apply a highly reflective material to the subject. Click on any empty slot, and change the standard material to 'Arch and Design', shown on the picture below.
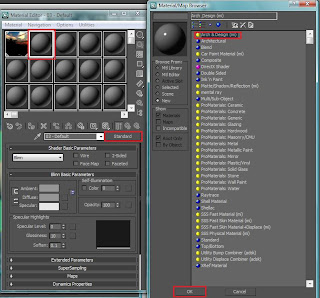 Then, click on the 'Select a template' drop down menu, and choose Chrome. Apply the material to the sphere. For the ground plane, use 'Arch and Design' - 'Glossy Varnished wood'
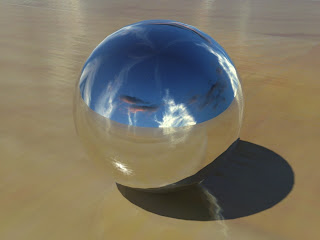
Below is the result of this tutorial. You can try to experiment different type of material to see how it reflects the HDR images.
I hope you enjoy the tutorial.
p/s : I'm still a beginner in 3D world so some terms and words that I used may not be accurate.
Ahhh...that's it..
ReplyDeleteKo mmg rajin buat benda2 ni.TQ2.
Akan ku try..
TQ2 byk2.TQ
haha takde hal punya..
ReplyDeleteBro, ade ketinggalan step ke?mcm xdpt je..reply cepat.aku tunggu
ReplyDeletebro fridz
ReplyDeletesorry reply lambat..
internet saya ada problem la.. dah sebulan x dapat surf..
boleh bagitau step mana bro sangkut? sorry sesangat
Saya follow semua instruction, cuma time render, hdri xkeluar kat belakang.
ReplyDelete